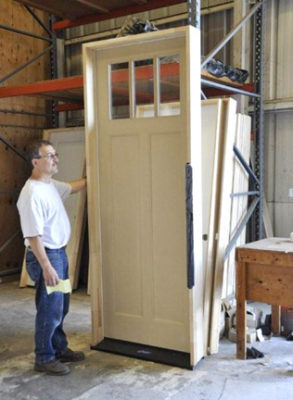
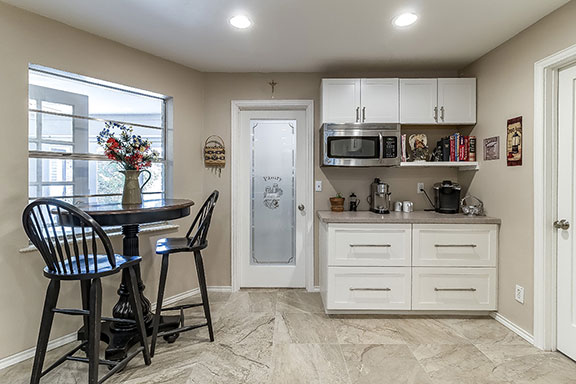
A pre-hung door comes already hinged to a door jamb made to fit your door opening. It is much easier than installing a slab door however, a helper is highly recommended. Continue for complete instructions.
Measuring for Your New Entry Door
Before you visit Dolan’s to select your new entry door, use a precise tape measure and measure the width of your door between the jambs, otherwise called the frame, and the height from the sill to the top jamb. Most doors swing in, but that’s important when selecting or ordering your door. Stand outside and note which side the door knob or handle is located on. Your door has a left-hand swing if the handle is located on the right side of the door and a right-hand swing if the handle is on the left side of the door. Now measure the width of the frame so the new door jamb will match.
Selecting Your New Entry Door
Visit your nearest Dolan’s location to find out about all the options and advantages that are available including materials, styles, and finishes. From fiberglass and steel to beautiful woods — with and without decorative glass — single and double-door styles — traditional, craftsman, period, and contemporary — ready-to-finish, pre-finished and custom finished. It’s a wide selection.We feature several famous name window and door brands from which to choose including Andersen, Jeld-Wen, Marvin, Masonite, Simpson, Simonton, Terma-Tru, T.M. Cobb, TruStile, and more.
The Pre-Hung Option
If you shy away from do-it-yourself projects, we suggest you have your new entry door pre-hung in our door shop. This means it is delivered already hinged and hanging in its own frame. The fee is nominal and you save the time and/or money of having the door hung at the time it is installed.
Pre-hanging your door is a must if your existing frame is damaged or warped which would make it almost impossible to hang a slab door. Another advantage is that your pre-hung door is weather-tight. It is not an easy task to install a slab door and make sure it is weather-tight. Just remember that a pre-hung door is much heavier than a slab door and you will need some help putting it in place.
Gather the Tools Needed for Installing Your Pre-hung Door
1.Level and Square.
2. Drift Pin.
3. Flat Bar.
4. Reciprocating Saw (optional).
5. Hammer.
6. Drywall Screws.
7. Caulk.
8. Phillips Screw Driver & Phillips Bit.
9. Entry Lockset.
10. Shims.
11. Window & Door Foam Insulation
The Installation
When your new door is delivered, measure it and check the direction of the swing before you remove the existing door. If everything checks out, start the installation.
-
- Remove the casings –– the ones on the inside and the brick molding or casing from the outside. With the old door closed, remove it from the frame by removing the hinge pins. Next, open the door and pull it out by separating the hinges. Remember, the old door may be heavy and we suggest having someone else there with you to help remove the door.
- Remove the old frame — either use a reciprocating saw with a metal cutting blade and run it between the jamb and frame to cut off nails (in case a hacksaw won’t work). When all the nails have been cut, push the frame out from the top and remove it from the rough opening. If you don’t have a reciprocating saw and a hacksaw won’t work you will have to use a flat bar and pry it out.
- Check the sill. If it is resting on the subfloor remove it and set the new door on the subfloor. If the sill is an extension of the subfloor, you will have to set the new door on it. Make sure the old sill is in good condition. If not, replace it using treated lumber matching the size. Make sure the framework under the sill is level or shim the treated sill to level. Add a good adhesive caulk under the sill before installing to keep water and cold air out. If the old sill is okay and not too high for the new door but not level, you must level the sill of the new door while installing. Make sure to use a good quality caulk between the metal door sill and the old sill. Make sure the opening is square (the house may have settled). If the frame is slightly out of square, you may have enough clearance between the door jamb and the frame to square the new door with shims. If not, align the trimmer studs or shave them down with a saw or a chisel.
- Time to install the door. Install with care to ensure the door remains aligned in the frame. You need an assistant to help you with the installation. Set the new pre-hung door in the opening and put a square on the upper corner on the hinge side and adjust the door until the door’s corners are square. When the hinge side is plumb, drive two 3″ drywall screws through the jamb and into the trimmer studs about 2″ below the top and center hinge to temporarily set the door. Using pairs of tapered shims, shim the hinge jamb by placing them directly behind the hinges. Then, shim the latch jamb in the same way. Secure the door frame through the empty hinge holes to the spinner studs. When the door is properly aligned, drive these screws through each set of shims. Using 3″ drywall screws, secure the lock-side jamb through the shims at three locations. Remove the pre-hang clips and open and close the door to check the swing. It should make uniform contact with the weatherstrip. If it doesn’t, remove the appropriate screws and realign the door and then reinsert the screws. If the door isn’t making good contact with weather stripping check to make sure you are plumb inside and outside.
- Finish sealing. Fill gaps between the jamb and studs with window and door foam insulation. Caulk brick molding and where the jambs and threshold meet the sill. Place two rectangular foam weather seals with adhesive on one side, at the bottom of each jamb just inside the door weatherstrip. Install your lockset and install the inside casing.
- If your door is not pre-finished, check the manufacture’s instructions before you paint or stain your door.


Your content is very informative. Thank you so much for sharing. It will be a big help for us.